
Dremeling is one of the practical methods of trimming your dog’s nails. It does the job in one go, unlike using pet nail clippers that later require nail filing to smooth out the edges.
The catch, however, is that dremeling your dog’s nails can be tricky. In most cases, the Dremel can intimidate dogs because of its sound and vibration. It’s the same experience even for owners who are new to using this tool.
Despite the Dremel being seemingly overwhelming to use, this is safer than the clippers. Go through this guide for the step-by-step process of Dremel nail grinding and start developing the confidence to use it on your dog.
What Is a Dremel®?

A Dremel is a brand primarily known for its hand-held cord or uncorded rotary tools, which can be used for various crafts and DIY tasks, such as grinding your pet’s nails. Some of its other well-known functions are sanding, engraving, cleaning or polishing, and sharpening objects.
When used as a nail grinder, it requires a sanding tip that rotates at high speed. This causes a certain nail length to be effectively ground. For it to function, it may need a cord, battery, or charger.
Further, a Dremel allows owners more control in trimming their dogs’ nails. This is because they can watch the progress without worrying about hurting the quick, which contains blood vessels and nerves.
It’s typically a preferred tool over guillotine or scissor-style clippers if your dog has thick nails. Nonetheless, it can accommodate any type of claws, regardless if you’re dealing with Pomeranian nails or Mastiff talons.
On another note, many canines have black nails, which can be hard to deal with. Owners with pets that have dark nails bring them to the salon and let professional groomers cut their nails.
However, once you get the hang of what a Dremel is, how it works, and how to use it on your dog’s claws, trimming nails can be done in the comfort of your home.
Choosing a Dremel
You need to look for a few features in choosing a Dremel. Generally, the tool to go for must be excellent in usability and effectiveness.
The results you aim for are to shorten your dog’s nails without reaching the quick of the nail and to smooth out their edges. That said, invest in top-grade Dremels that can do the job properly.
To aid you in purchasing a Dremel, here are some of the qualities you need to consider:
- Comes with an adjustable speed: A quality Dremel’s speed should be adjustable so you can work on different dog nail types. The preferred speed range of the tool is 10,000 to 15,000 RPMs (a.k.a. the sanding band’s rotations per minute).
- Produces minimal noise: Some dogs fear noises, and it’s not surprising if your pooch exhibits a side-eye when the Dremel is turned on. To avoid scaring your pet during a nail trimming session, choose a Dremel with gears that produce a low-pitched noise.
- Has a comfortable grip: Grinding dog nails with Dremel takes longer than trimming your dog’s claws with a nail clipper. That said, a Dremel should be easy to hold and lightweight to avoid causing a strain on your hand and arm.
- Has a cordless system: Cordless Dremels save you the hassle of untangling the cord as you trim your dog’s nails. Plus, you can maneuver it easily, allowing you to grind from any angle.
- Easy to clean: Though an easy-to-clean feature is optional, a Dremel with this quality makes it better than other grinding tools. Depending on the design, it may have a removable plastic sheath around the grinding band that can catch the dust from the nail.
- Comes with an LED light: If you’re trimming your dog’s nails and need light to properly see where the quick is, a Dremel with an LED light on the nose cap helps. If your dog has black nails, it’s all the more reason to choose a nail-grinding tool with lights.
A good Dremel with these characteristics makes nail-trimming sessions hassle-free. These features, along with proper usage, will create a positive experience for your dog.
Of course, your pooch needs to get accustomed to having something moving on its nail tips, but it will eventually get used to it.
Necessary Tools and Supplies
A Dremel is just one of the items you need when trimming your dog’s nails. Pet owners must know and prepare the complete tools and supplies to avoid unnecessary breaks.
Listed below are the tools and supplies necessary before you start grinding your dog’s nails:
- Dremel nail grinder: The Dremel nail grinder is used to easily and gently trim your dog’s nails. Its tip’s high-speed rotation gradually sands down its long claws until the desired length is achieved.
- Sanding disc: The sanding disc is an essential component of the Dremel nail grinder since it is responsible for safely trimming down your dog’s claws. It is attached to the mandrel and can be replaced once worn out.
- Towel: Place a towel underneath your dog’s paw if you don’t want the filed nails to be all over the place. This way, you’d have an easier time tidying up the area and have little nail residue to clean after the nail trimming session.
- Dog treats: Giving dog treats is essential in making your dog associate the nail trimming session with a fun, rewarding experience. It helps condition your pooch to relax during nail trimming time.
- Styptic powder: If you accidentally injure your dog’s nail, a styptic powder, an anti-hemorrhagic agent, should be near your reach. This helps stop the wound from bleeding. When applied, your dog will experience an initial sting, so hold its paw for a while for this anesthetic to work properly.
When all these tools are set, it’s time to start dremeling nails. But before you do so, you must also learn all the steps to ensure a smooth nail-trimming session for your dog.
10 Easy Steps to Dremeling Your Dog’s Nails
Knowing how to properly treat your dog’s nails is essential to avoid injuring its quicks.
If this is your first time using the Dremel tool, you must know how to dremel dog nails and, of course, use the nail grinder properly.
And while these things are important, there is also a safety precaution to bear in mind.
If your dog has long fur around the paws and between the paw pads, it’s best to trim the coat in the area to avoid it getting caught by the grinder’s rotating tip.
Below are ten easy steps on how to dremel your dog’s nails:
1. Prepare the Dremel nail grinder
The Dremel has several components; you need to put everything together before using it. If it’s battery-operated, it’s sensible to put the required batteries into the device.
Make sure that the mandrel and the sanding band are installed.
If your dog is used to getting its claws ground and exhibits calmness, a plastic protective sheath can be placed around the tip for a less messy nail-grinding experience.
2. Make your dog comfortable
Secure a comfortable position for you and your dog. Contrary to sitting opposite the canine, it’s much more ideal if you both face the same direction.
This way, you could easily reach for its paws and work on its nail from different angles.
Once your dog is well-settled, you can pet it gently to make it feel more relaxed. It will also prevent your pooch from getting anxious when it realizes its nails are about to get filed down.
3. Introduce the Dremel to your dog
Before you start working on your dog’s nails, introducing the Dremel to it first is crucial. You can let your pet see, sniff, or touch the Dremel. While you do this, gently touch and rub its paws.
If your dog is okay with it, give it some affection. By then, turn on the tool and let your pet know the sound it makes. See how your dog reacts to the buzzing noise by turning on the Dremel for a few seconds.
There is progress if you turn it on for a longer period, and your dog stays calm the whole time. That can indicate that it’s ready for the nail trim.
4. Determine how short the nails should be
Next up is determining how short your dog’s nails should be. You must avoid grinding through the most sensitive part of the nail, which is the quick.
If your dog has white nails, locating the quick is pretty straightforward. You can see it when you gently squeeze the paws and direct the nails to a light source. It is pink and contrasts well with the dog’s white nails.
Meanwhile, a dog with black nails needs more than just getting its nails lighted. You have to look for the pulp, a dark circular part of the dog’s claws. You’ll be able to locate the pulp after you make the first few trims.
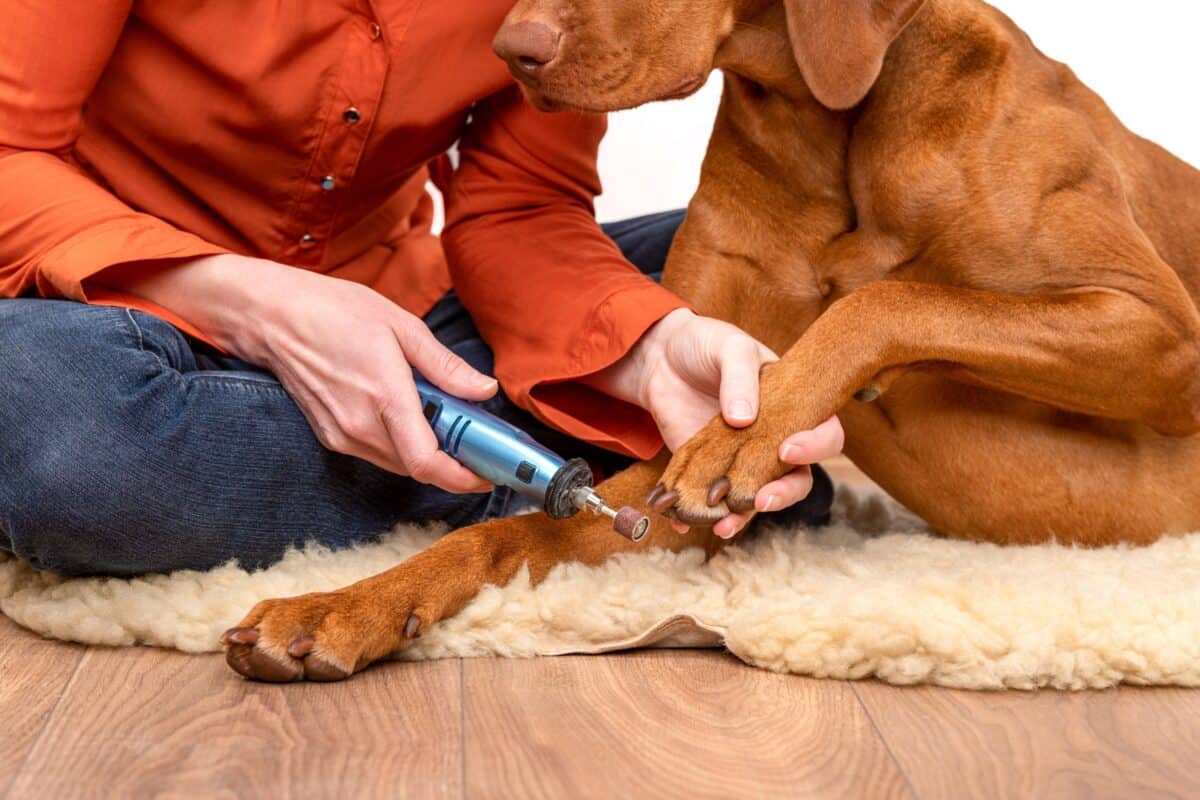
5. Start trimming your dog’s nails after the initial steps
Hold your dog’s paw using your non-dominant hand and press it gently until the nails are exposed.
Next, rest your dominant hand’s thumb over your other thumb to ensure safety during the process. This gives you better control of your movements with the Dremel.
You can start filing your dog’s nails when you turn on the Dremel.
It’s best to go for a slow rotation speed if you’re working on short nails. This way, you’ll have less chance of accidentally hurting the quick.
Meanwhile, going for the high-speed setting is ideal for long-nailed dogs only if they are comfortable with it.
Hold the tool at a 45-degree angle, following your dog’s nail shape, and carefully let your dog’s nail touch the sanding disc. Avoid pressing the nail too hard on the tool to accurately achieve the desired nail length.
Start rounding and smoothing out the edges for the finishing touches.
6. Go slow if you have a puppy
If you are dealing with a puppy, it’s recommended that you trim only one nail a day. It does better with quick grooming sessions rather than giving a full nail trimming drill.
It takes time before it adapts to a routine, so be patient with the process. As you go about this, ensure that your puppy remains happy. Do this by talking to it soothingly or giving it a treat.
You also have to take advantage of this moment and make your puppy associate this with bonding time. Moreover, when you grind its nail, do so with confidence.
After all, dogs can catch their owner’s emotions. If you are anxious while using the Dremel, your dog will most likely feel the same.
7. Have in-between breaks and offer tasty treats
Nail trimming can be stressful for dogs, especially if you do it in one go. So, having in-between breaks is ideal to ensure it stays comfortable.
Dremels cause friction against the nails, and the tool can also overheat. If you keep going, your dog will start feeling a burning sensation on its nail. That said, it’s all the more reason to allow gaps during nail trimming.
Take this time to inspect every nail you have trimmed already. Additionally, reward your dog with treats and cuddles, so it will look forward to the session continuing.
8. Grind the dewclaw nails too
In the dog world, a dewclaw is considered a dog’s thumb. Dogs have it on their front legs, and some also have it on their hind legs.
This extra little toe is located on the higher inner corner of the paw. It has a claw that grows much faster than the other nails since it’s not worn down from walking.
Bearing that in mind, don’t forget to grind the dewclaw’s nail. Do so the same way you did it with the other nails.
9. Inspect the nails after trimming
Once you’re through filing all of your dog’s nails, it’s time to check if all nails were filed properly. Make your canine stand on all four paws on a hard, flat source.
Check every nail to see if it’s still touching the ground or is perfectly short already.
On a different note, if your dog is limping, check its paw’s nails to find out if one of the quicks has been injured. Apply some styptic powder if it’s bleeding to avoid further complications.
10. Reward your dog for good behavior
It’s certainly a milestone for your dog to complete a nail-trimming session. However, for some dogs, it’s a stressful moment. If this is the case, the more you should reward your dog for overcoming the stressful trimming session it went through.
Show how proud you are of your pet by giving it a lot of praise, cuddles, and treats.
The next time it needs its nails trimmed again, your dog will likely go through with it without showing too much resistance.
Advantages of Dremeling Dog Nails
Using a Dremel nail grinder has various advantages, which is why many pet owners use it for their pets. To say the least, it’s a great alternative to your old-school clippers.
Here are some of the advantages of dremeling your dog’s nails:
- You have more control. Thanks to the adjustable speed of a Dremel, pet owners no longer have to worry about accidentally reaching the quick. You can go slow if you’re new to using the tool or increase the speed once you master how to use it.
- Dremels don’t get dull. Clippers can get dull after considerable use, but Dremels are different. It uses a sand band that can be replaced with a new one once worn down, so it’s good as new when used again.
- Works well with thick dog nails. Large dog breeds, such as the Mastiff and Doberman, have big, tough nails that you must deal with during nail trimming time. If such is the case, a heavy-duty tool like the Dremel can work excellently on such nail types.
- Perfect for smoothing out nails. With a nail Dremel, you are filing your dog’s nails short and can also use it to smooth them out. There’s no need to use a nail file, unlike when you use nail clippers.
- Makes trimming short nails easier. If your dog has short nails and you’re nervous about cutting it and injuring the quick, a Dremel, with its adjustable speed, is a safer option. With this tool, you can take your time getting your dog’s nails as short as possible.
Aside from the ones listed above, nail dremeling also avoids cracking or splitting your dog’s claws.
Also, your dog will feel less discomfort in the nail area when you use a Dremel compared to clippers that squeeze the nail when trimming.
Frequently Asked Questions

Is a Dremel Good for Dog Nails?
A Dremel is good for dog nails since it gradually trims them. This reduces any risk of going too short or reaching the sensitive nerves within the nails.
It’s also safer than clippers if your dog has black nails. Since you can’t easily find the quick, you can slowly trim it using a Dremel until the pulp shows.
How to Know When to Stop Dremeling Your Dog’s Nails?
You can stop dremeling your dog’s nails once the pulp or the small white spot for white-nailed dogs starts appearing. Meanwhile, for black-nailed dogs, you have to watch out for the black spot.
Once the nail’s pulp is visible, it’s safe to say that it is the shortest you can go with nail trimming.
How Often Should You Dremel Your Dog’s Nails?
Dremeling your dog’s nails can be done once a week to keep the quick from getting long while the nails are maintained short.
It also depends on how fast your dog’s nails grow. If it loves to walk or run around rough surfaces, which helps grind its nails, the less often you should use the nail Dremel on your pet.
As for the dewclaws, aim to dremel them twice weekly to avoid them from becoming overgrown. Short dewclaws also prevent your dog from getting injured by random objects they may get caught into.
Is It Better to Clip or Grind Dog Nails?
Clipping and grinding are both efficient and effective methods of trimming dog nails. However, the advantage of nail grinding is that it makes the tip of your dog’s nails round, while clippers leave sharp edges.
Moreover, novice trimmers are less likely to cut their dog’s nails too short with a grinder. This is because nail grinders gradually shorten the nail.
It’s also more preferred by owners if their dogs have been traumatized by nail clippers. Still, it boils down to how properly the clippers and nail grinders are used.
Final Thoughts
A Dremel is one of the best tools to trim your dog’s nails without causing too much stress. It’s simple and can do the job of a nail clipper and filer, making grinding a convenient method for dog owners.
Still, you need to introduce this early and let your dog get used to the rotating motions it makes on its nails. You can also help desensitize your dog to touch by massaging its paws before a nail trimming session.
Have you tried the nail-grinding method on your dog’s claws? Let us know how the step-by-step guide on dremeling dog nails helped you by leaving a comment below!